Getting Started with Administering Your Site
- IT Info
As the company administrator for your site, you can set up services to match your needs. To start administering your services, click the Admin Access tab (visible only to administrators) at the top of the Home page. The Admin Access page appears with the following dropdown menus:

Follow these steps to set up and administer your site:
Complete Your Company Profile
Your company profile information populates the site's fields to make booking services easier. You can add a site logo along with your company's address, phone, and web site. You can set the date and time format, the time zone, the unit of measure. and the type of currency. You can also add a company address book in order to quickly track attendees for certain expense types in Expense, such as meals and meeting expenses.
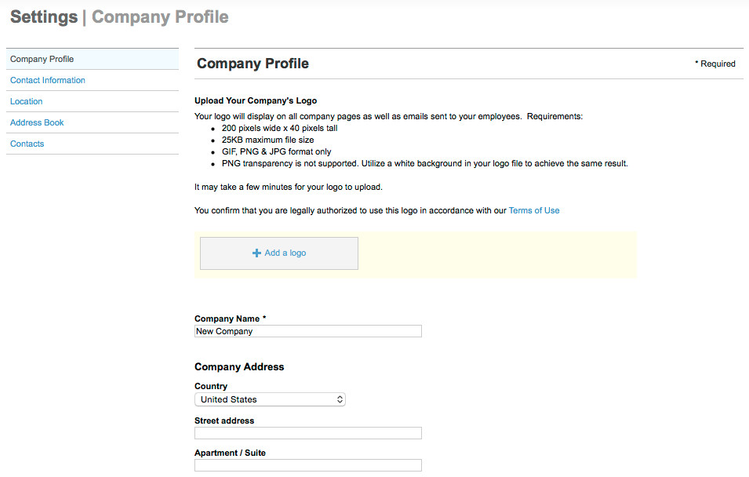
To set up your company information, choose Company Profile from the Company dropdown menu on the Admin Access page, and follow the instructions in Setting Up Company Information.
Add Your Company's Spending Guidelines
The next step is to add your company's spending guidelines for Travel and your expense types and allocations for Expense.
Travel Policies and Guidelines
Flexible policy controls let you define how employees can save your company time and money. Guidelines appear in search results to help employees make booking decisions within your company's policies.
Travel policies are provided for you, which you can modify as you wish. For example, a provided flight policy can be modified to allow or disallow booking first-class flights, and a provided hotel policy establishes your custom per diem for all cities. You can also add a policy message to your site that employees see if they violate a policy, and set whether users must enter an explanation.
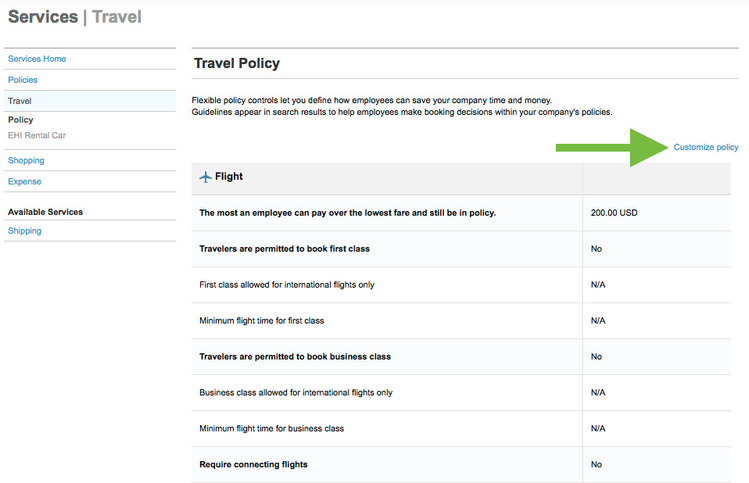
To modify policies for the Travel service, choose Travel from the Services dropdown menu. On the Services | Travel page, click the Customize policy link on the right side of the page to make changes. Then follow the instructions in Administering Travel.
Expense Types and Allocations
You can set up Expense to match your business accounting practices in order to effectively manage expense reports. Set up payment types, expense types, custom fields, cost allocation, expense and receipt policies, corporate card feeds, and delegates who can submit expense reports for others.
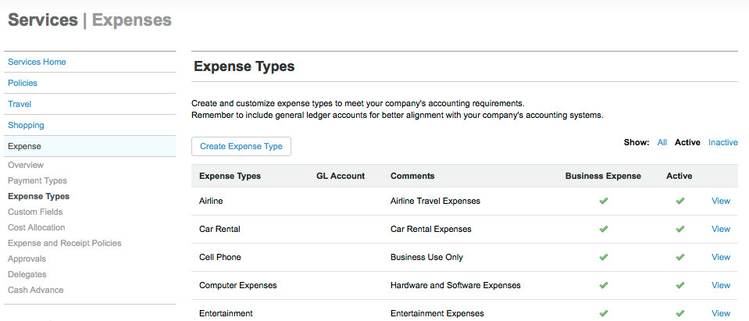
To administer Expense, choose Expense from the Services dropdown menu. The elements you can change are listed in the left column of the Services | Expenses page. For example, to set up expense types that your company allows, click the Expense Types link in the left column.
For all elements of Expense, see Administering Expense for instructions.
Invite Your Team and Set Up Approvals and Delegates
Finally, add your company's employees, and assign them to departments and managers for approval. Adding employees to your account grants them the ability to book travel services and submit expense reports.
To set up departments for your company, follow the instructions in Administering Departments.
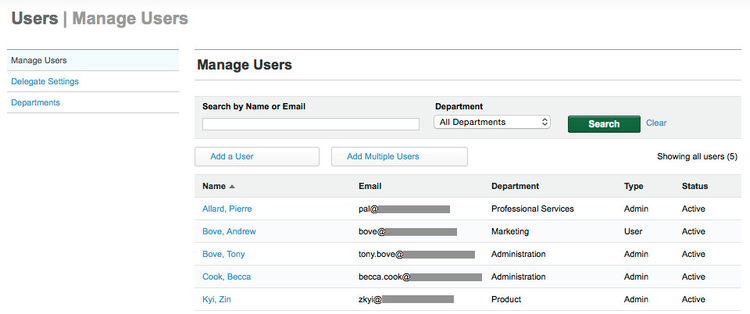
To add users, choose Manage Users from the Users dropdown menu. While adding or editing users, you can not only assign users to departments, but also set each user's approver for the expense report workflow, and set whether a user can also be an approver of other reports. After adding a user, the user receives an email invite to log into the site. See Adding and Managing Users for instructions.
You can also set up one or more delegates. A delegate has access to another user’s account and can book services on that user's behalf. A delegate can book travel for another user, and create and submit another user's expense report. For instructions, see Enabling Delegates.
Note: For more information about Admin Access, see Frequently Asked Questions (FAQs) about Admin Access.