Setting Up Company Address Books
- IT Info
As the administrator, you can set up site-wide company address books, and activate global address books (such as a public database for physicians), in order to quickly track attendees for certain expense types in Expense. Your site must be configured to offer this feature. The contacts in the company or global address books are available for use by all company (or site) users.
Note: To use attendee tracking, you must set up one or more expense types (such as Meals) to include the attendee tracking option. See Setting Up Expense Types.
Submitters of expense reports can then quickly search for and add attendees from these address books when creating an expense report line item with the expense type. For example, submitters can quickly add attendees for a meal expense. (See Adding and Editing Expense Report Line Items for more about creating an expense report line item.)
Follow these steps to set up company address books:
- Click the Admin Access tab (visible only to Expense administrators) at the top of the Home page to open the Admin Access Dashboard (if it is not already open).
- Click the Company tab, which opens up your Company Profile page.
- Click the Address Book link to show the Settings | Address Book page:
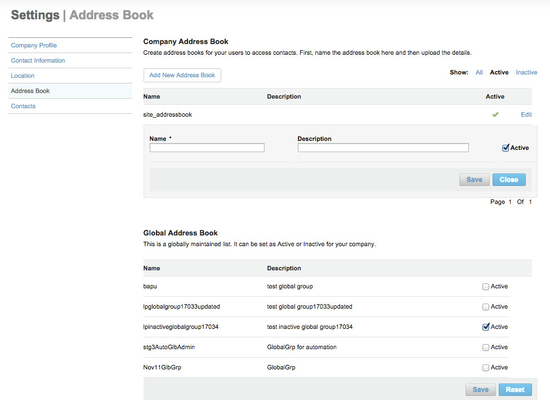
- To add a site-wide company address book, click Add New Address Book under the Company Address Book heading.
- Enter a name for the address book in the Name field, and a description in the Description field.
- Make sure the Active setting is turned on.
- Click Save to save the address book.
- Follow the instructions in Uploading Contacts to Company Address Books.
- To enable one or more global address books, click the Active checkbox for each address book, and then click Save to save your choices.